Updated on 3 July 2025
Think of a centralized media center, just like the one in your home, but with the convenience of everything in one device. That’s what Plex Media Server aims to do: sharing your movies, music, and photos in all of your devices using a single account. You can even use it on your gaming consoles such as PlayStation and Xbox, as well as your Smart TV. It syncs seamlessly so you can stream on your phone or tablet without being interrupted.
Plex Server is a very useful media server and I love that I can watch my favorite TV shows with it (Brooklyn Nine-Nine, anyone?). If I’m working and I want to take a twenty-minute break, I can open Plex from my laptop and watch there. Or if I’m commuting, I can continue watching the episode where I left off, using my iPad.
Signing Up
For you to know what is Plex Media Server and how you can use its features, you have to go to their website, Plex TV, and sign up for a free account. Getting Plex up and running in your computer is quick, easy, and can be achieved in just three steps. Again, only one account is needed to stream using all of your devices.
Plex will display a pop-up ad saying that going Premium will allow you to access more features. For me, using it for free is enough for now until you can decide if you’ll commit to using the app for a long time. If you’re considering subscribing to Premium, you can find a list of the full features and comparison at their website too.
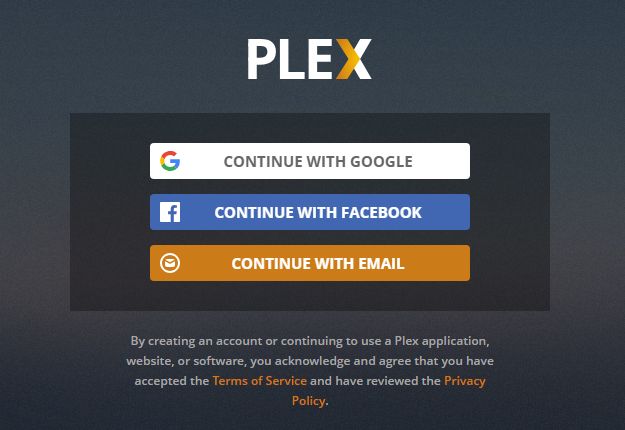
Click the link that says Get a FREE Plex account. You will be shown this option: To create an account using either your email, Facebook, or Google account. For my account, I chose to continue with my Facebook account.
After entering your login credentials and granting Plex to access your profile and email address (if you choose Facebook), the sign-up process and finished and you will be redirected to the Plex Media Player dashboard.
Installation
The Plex TV dashboard is where your music, photos, and movies will appear. However, if you haven’t installed the Plex Media Server for your computer, you won’t have a server which Plex will use as a media source.
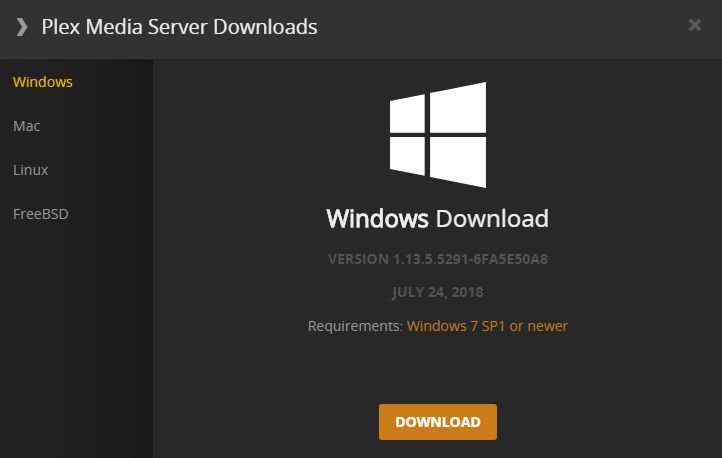
To install the Plex server for your computer, click the button that says Download Plex Media Server. This will display a box that lets you choose the operating system that your computer runs on. It will also display which version it is you’re downloading and the OS version required. Click the Download button to continue.
After the download is finished, the dashboard will instruct you to install the server to your computer. Simply click the file at the bottom screen of your browser or check the Downloads section.
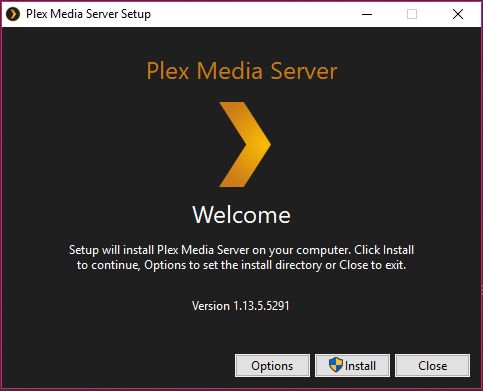
Click the Install button once this window pops up. This application will allow Plex to gather media from your computer and display it in your dashboard once you’re done.
The setup process will now start. This process is quick and will only take about 5 – 7 minutes.
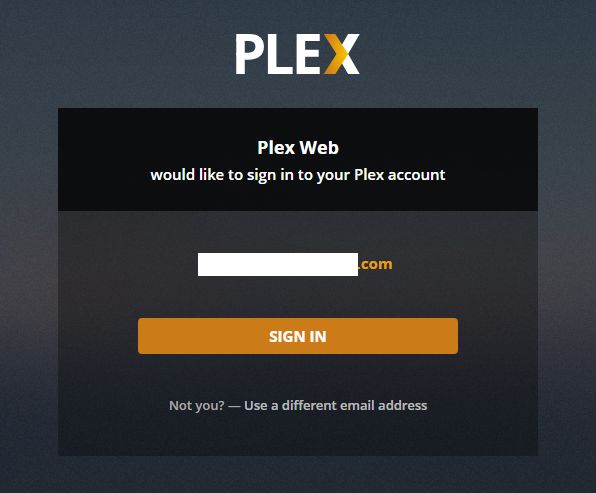
Once the setup is complete, you can now launch Plex and a server is now created. You will be redirected to the web page to sign in with your Plex account again. Click the Sign In button so you can continue using Plex TV.
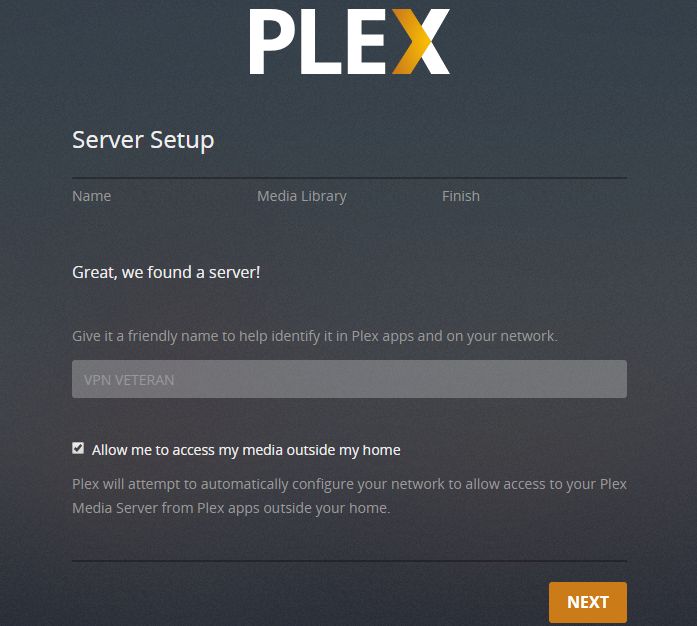
After signing in, you will be asked to set up your server. Choose a name that will help you identify it when you’re using Plex apps. If you don’t choose one, it will use your computer’s name by default. You can always change this later in the settings.
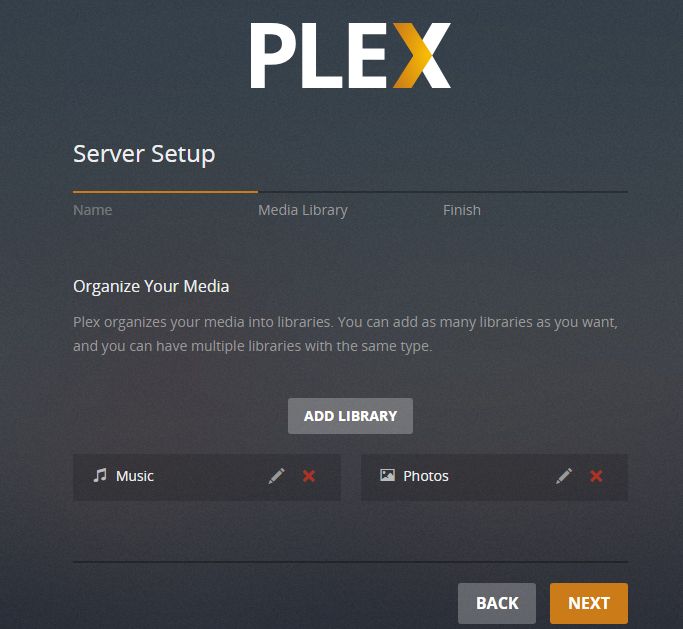
Next, choose the media libraries that you want to access from. You can add as many as you want, even those with the same file types. Plex Server scans your library and organizes it for you so you can access it easily.
You can now use Plex TV anywhere on your app. Just sign in with your account using any device and access your favorite photos, movies, and music.
Dashboard
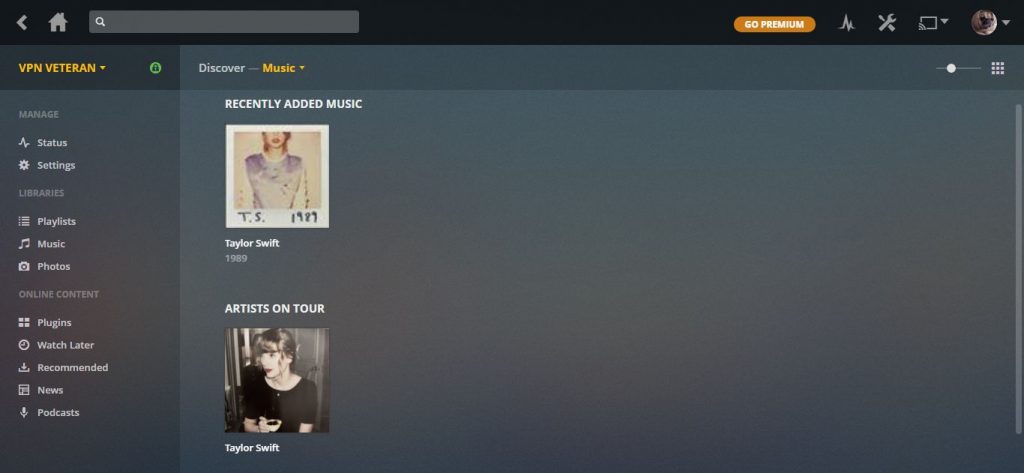
Your media will appear here on the dashboard. There is also a section for Newscast which Plex chose for you. The toolbar at the top of the page contains a back button, a home button, a status icon, app settings, a Chrome Cast add-in, and your profile photo with a drop-down menu of your account settings.
In the toolbar below that, there’s your account name with a drop-down menu, a menu for all of your media libraries, and a view option.
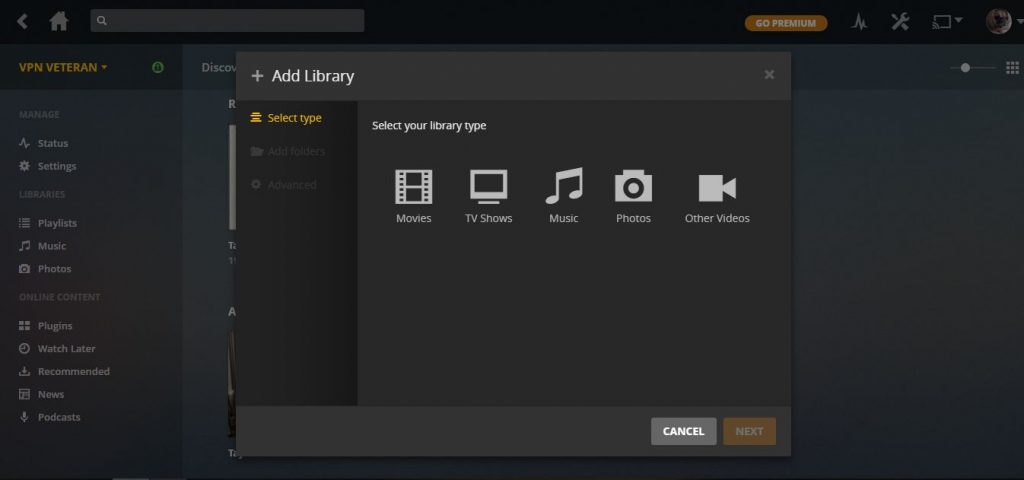
If you want to add more music, photos, and videos, you can add a library. In the left sidebar, just select the type of media you want to add (or click the + plugin beside Libraries). Select what you want to add: Movies, TV Shows, Music, Photos, or other Videos. Then click the Browse Through Media Folder button in the next window then search for the files that you want to add.
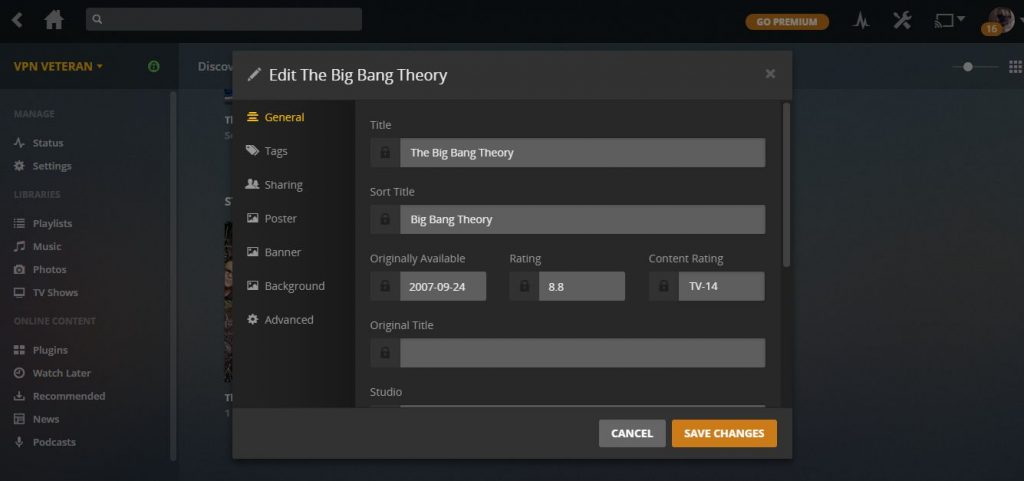
In my case, I added The Big Bang Theory to my TV show library. This is what it will look like in the dashboard after you add it. I think it’s very cool that they have an online information on the media that you add, so you can edit the title, banners, posters, and background using the photos that they provide. They even have information about the TV show such as the year it aired, the ratings, and a summary of the show. Normally, those things aren’t shown when I originally downloaded them and watched them using VLC.
This edit window is also available for the music and the photos. It’s a good way to accurately label and beautifully organize everything you have in Plex.
Configuring Plex TV Settings
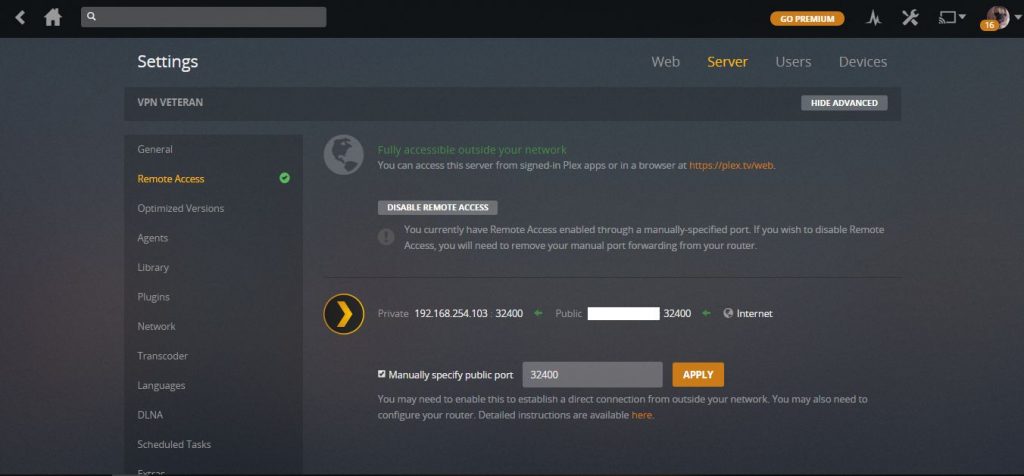
To make your experience as seamless as possible, you can tweak your settings from time to time. For example, enabling the Remote Access will allow you to sign in and use Plex no matter where you are.
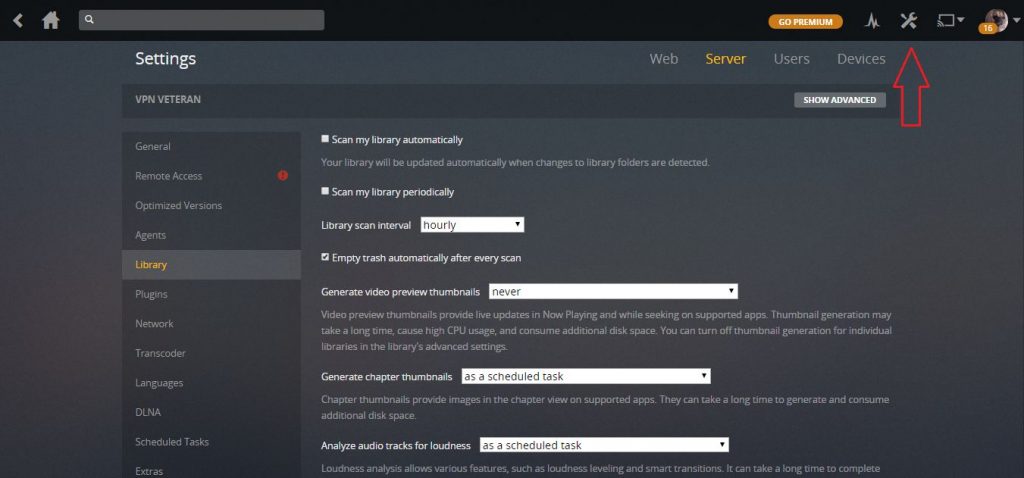
Upon installation, the Plex Media Player settings are set to default but you can configure it any time. Click the Settings icon at the top toolbar, indicated by the red arrow in the photo below. Then select Server, and go to the Library (found at the left column).
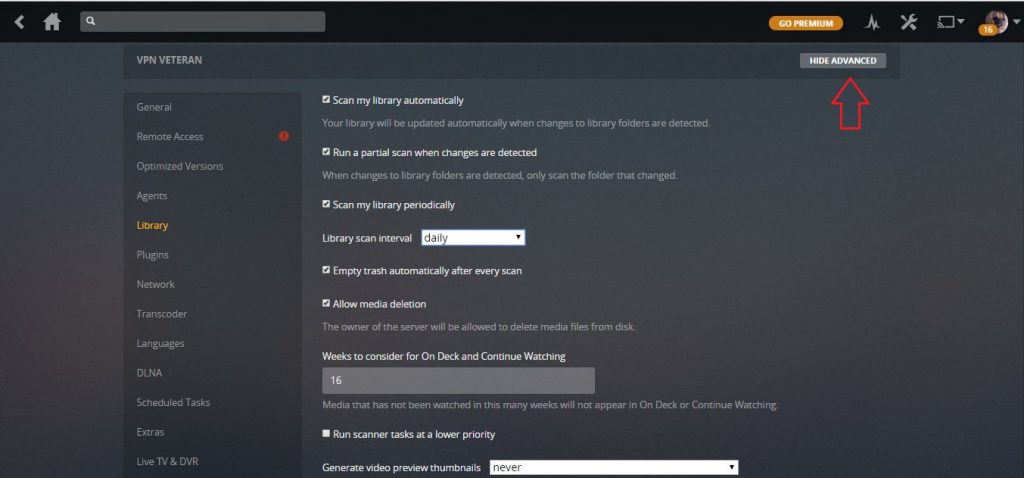
Check the boxes for the first two ones labeled Scan my library automatically and Scan my library periodically to make sure that your libraries are updated as soon as Plex detects some changes made in the folders from your computer. You can also configure the time interval of the library scan.
To show more settings, click the Show Advanced button at the upper right part of the screen, indicated by the red arrow in the photo below. Allow media deletion will let you delete files remotely without having to use the server (i.e. your computer), so you can just trash TV shows that you’ve finished watching through another device instead of having to manually delete it from your computer.
If you want to make more adjustments, just change the settings to your preference, then click the Save Changes button at the bottom of the page.
Enabling Remote Access
To enable remote access, select the Remote Access menu found at the left sidebar. You’ll see whether your remote access is fully accessible outside your network or not. If not, and it shows Not available outside your network, then you’ll have to troubleshoot it. Fortunately, Plex has an article on setting this up.
Configuring video streaming quality
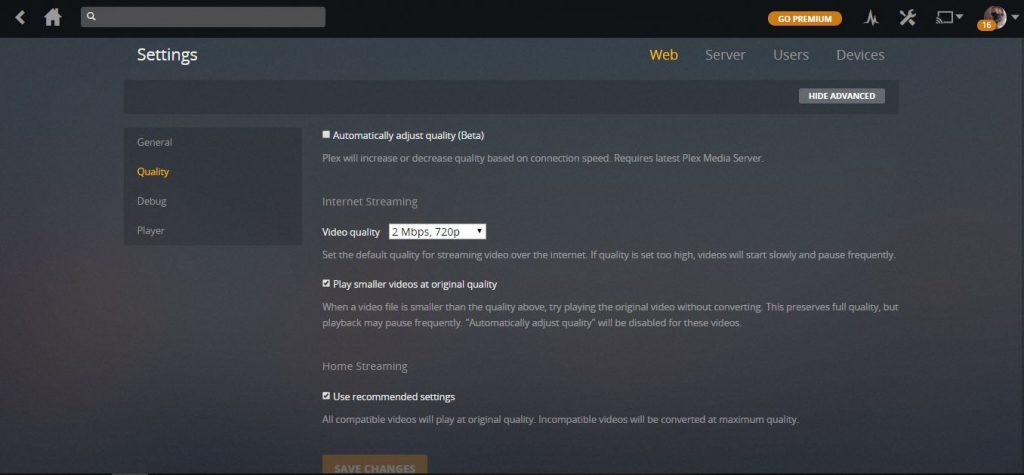
If your internet connection is quite slow, it might affect the quality of the videos that you want to stream through Plex TV. You can change the quality of the videos to avoid constant buffering. To configure this, click the Settings icon on the upper right corner of the screen, then select the Web menu. Then choose the Quality menu on the left side of the screen.
In the Video quality setting, adjust the quality to your preferred option. You can lower it to 480p if your bandwidth isn’t capable of 720p, and so on.
There are also different settings for your player in the left side of the settings menu. In the Player menu, you can configure the audio and subtitle settings.
Adding plug-ins
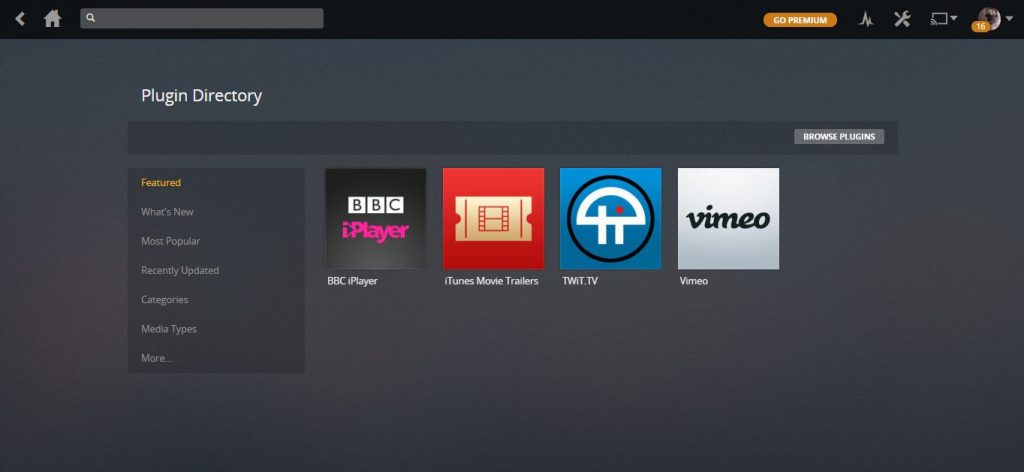
Plex also allows you to install plug-ins so you can stream media from other online sources. You can add plug-ins by returning to your dashboard and selecting the Plugins menu located on the left sidebar. Click the Install Plugins button on the upper right corner of the screen.
You’ll find plenty of plug-ins here that are available for download. Select the plug-in that you want and a description of the plug-in will be displayed. Click the Install button and wait for it to finish. You can log in using your Plex credentials if you want to use it.
Plex Clients
Setting up other devices as Plex clients is pretty easy from this point. All you need is your Plex login credentials and you’re good to go. These are some of the client devices supported by Plex:
- Android, iOS, and Windows mobile devices
- Xbox 360 and Xbox One
- PlayStation 3 and PlayStation 4
- TiVo and Sony, LG, Samsung, and select Toshiba Smart TVs
- Kodi
- NVIDIA Shield
- OSMC Vero 4K
- WeTek Play 2
- Select Intel and ARM-based NAS devices
- Amazon Fire TV and Fire TV Stick
- Chromecast
- Raspberry Pi
- Apple TV
- Roku devices
- Mecool BB2 Pro
Plex Pass Premium
If you have used Plex and would like to upgrade to Premium, you can get the Plex Pass. It costs $4.99 per month, $39.99 per year, and $119.99 for a lifetime subscription. Personally, I think the free version is enough but going Premium definitely has plenty of perks and I might go for it if I use Plex long-term.
Here are the features that you get when going Premium:
- Mobile Sync – Lets you use Plex through your Android, iOS, and Windows devices even when you’re offline.
- Live TV and DVR – Gives you access to free OTA broadcasts by connecting to a tuner and antenna.
- Trailers and extras – Sneak peak to trailers, cast interviews, and bonus features that aren’t available with the free version.
- Camera Upload – Automatically sync your captured photos to the Plex Media Server.
Want to know more about Plex?
We love using Plex TV as our media server, and we’d like you to enjoy it as well. If you want to know more about Plex, check our website for tutorials, reviews, and updates. We’re constantly on the lookout for the latest news on our favorite apps, so be sure to come back often.


