
Updated on 7 June 2026
Samsung smartphones are usually difficult to have root access because of the advanced built-in security features. So, when the Galaxy Note 8 made its appearance in the market, many people were waiting for tutorials on how to root your Galaxy Note 8.
Before deciding to root your galaxy Note 8, here are some concerns about the unlocking process.
- This tutorial will only work on the US version that is powered by the Snapdragon 835.
- To unlock your phone you will need a laptop or a PC.
- Backup everything you need on your phone because the process will erase everything in your Note 8.
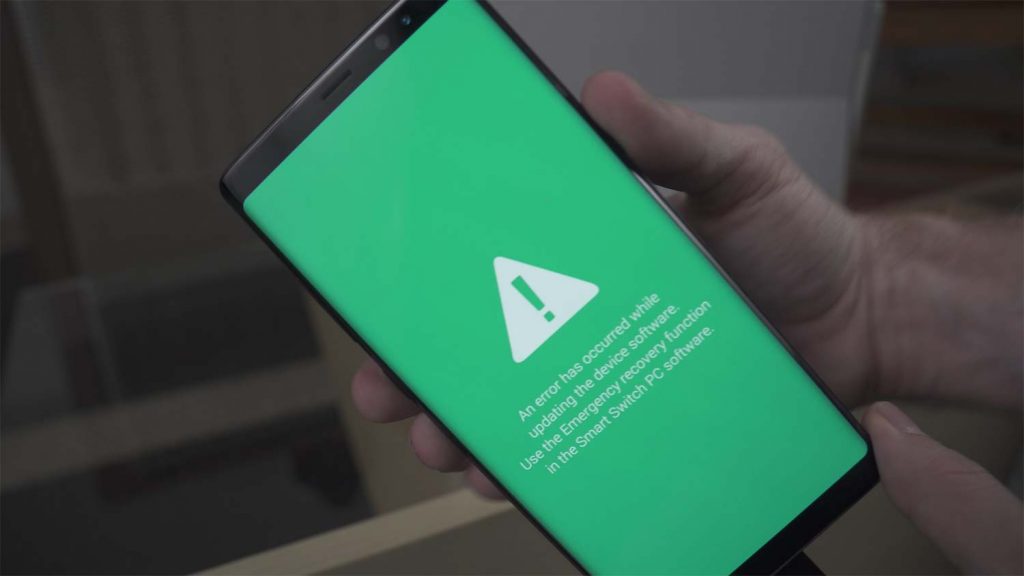
- There might be a chance that your phone will never charge to more than 80% because of the boot.img we will be using.
- Your warranty will be void when you root your phone. Although you can restore the stock firmware by unrooting it again.
- Rooting your phone is not something an average smartphone user should do.
Well, you are fairly warned. Now here are the processes for rooting your Galaxy Note 8:
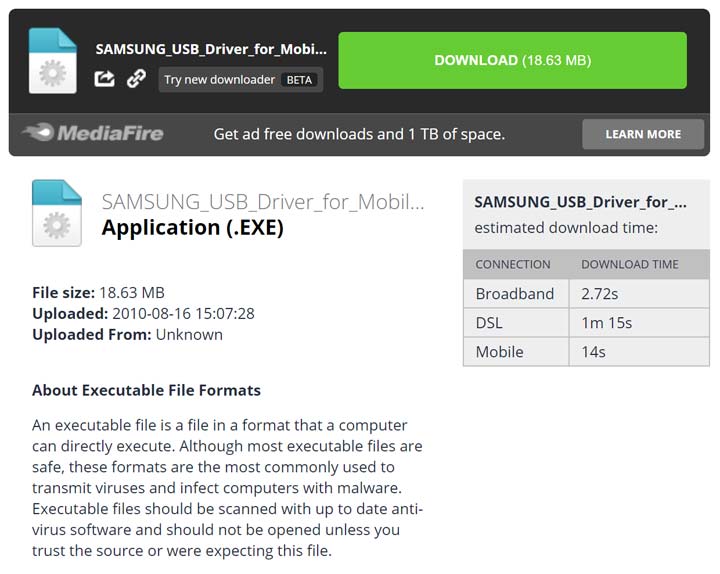
- First, you need to download and then install the Samsung Drivers on your laptop or PC.
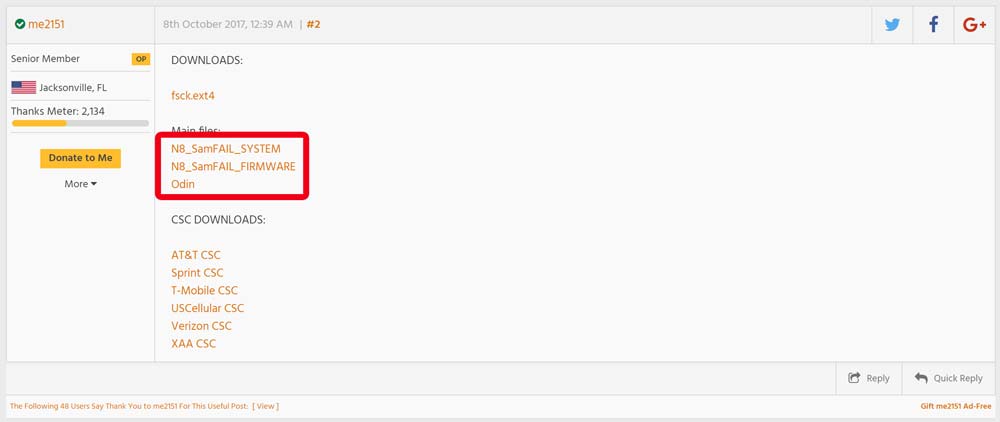
2. Now, we will download these files from XDA: SAMFAIL Firmware, SAMFAIL System, and Odin. Save those on your Desktop and then extract all of them.
3. Next, you need to open the extracted Odin folder. You need to double click the Odin .exe file.
4. You will then need to turn off your Note 8. By pressing the Power, Bixby buttons and Down Volume at the same time, put your Note to Download Mode. Keep on pressing those buttons until the phone displays you are in download mode. Plug your phone into your PC.
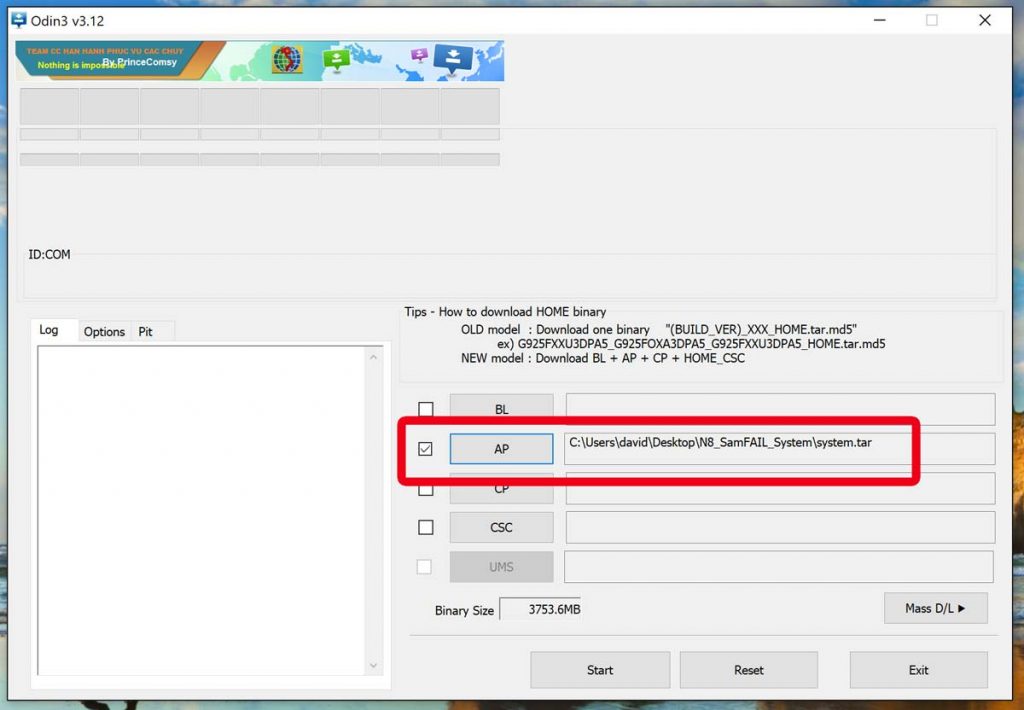
5. Click the AP button in Odin and then select the system.tar file from the extracted SamFail System folder.
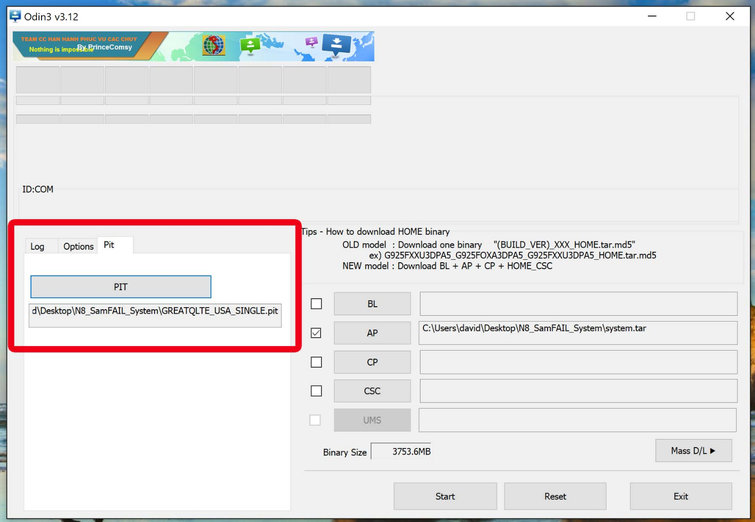
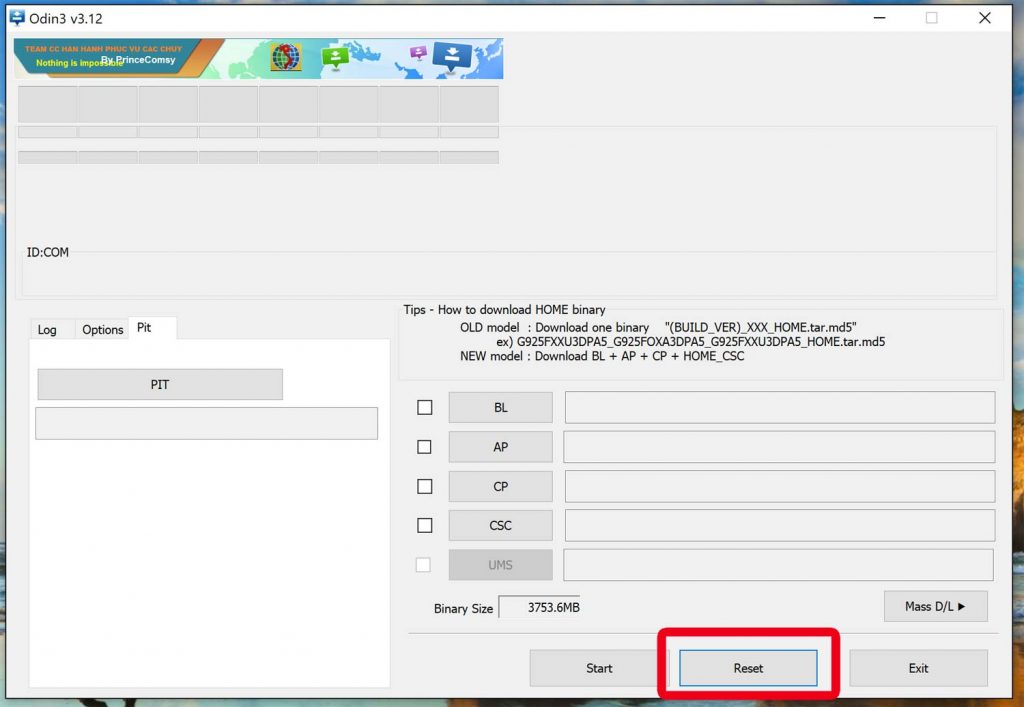
6. On the left of Odin, select the PIT tab. After that click PIT and select .pit file from the same folder.
7. On the Options tab, make sure that only these are the ones that are checked:
- Re-Partition
- NAND Erase All
- F. Reset Time
- Auto Reboot
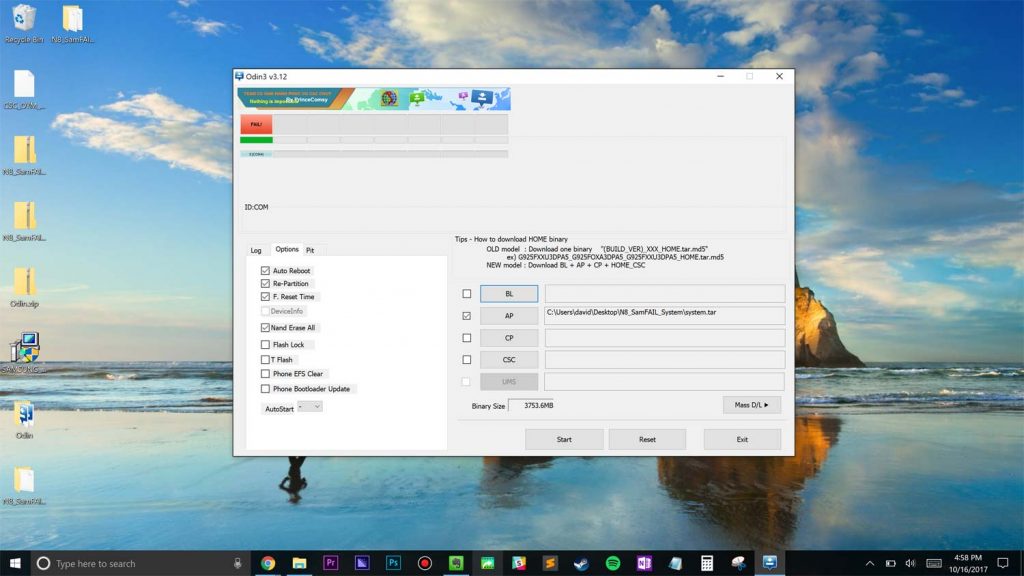
8. Select Start and then wait for your phone to flash. It will work even if it says FAIL at the end.
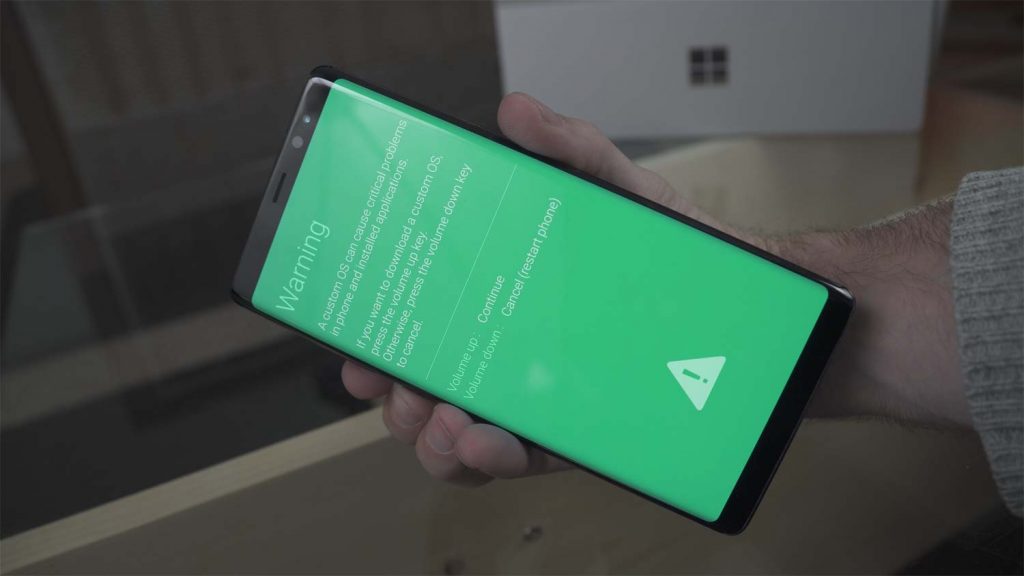
9. Put your phone back to Download Mode (If ever you ended up in upload mode, you only need to hold the same buttons again until you get to download mode). If your phone says it is in emergency mode, that is also okay.
10. In Odin, click Reset.
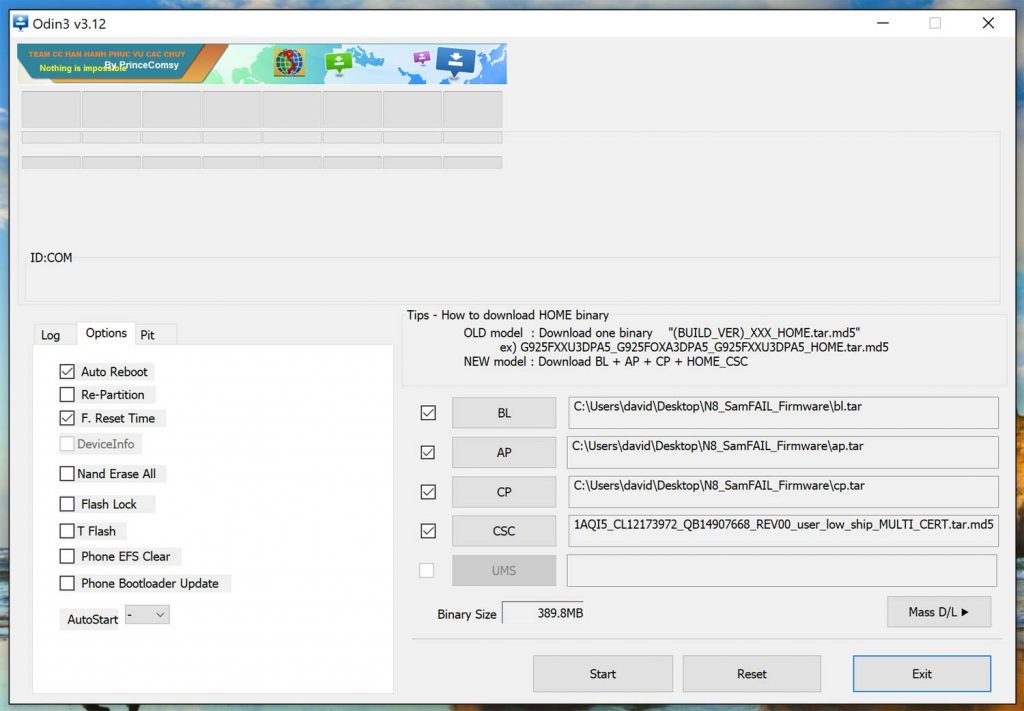
11. Again in Odin, Click BL. Then select the BL file inside the extracted folder. Next, click AP and then the AP file. Next, click CP and then the CP file. Lastly, click CSC and then the CSC file.
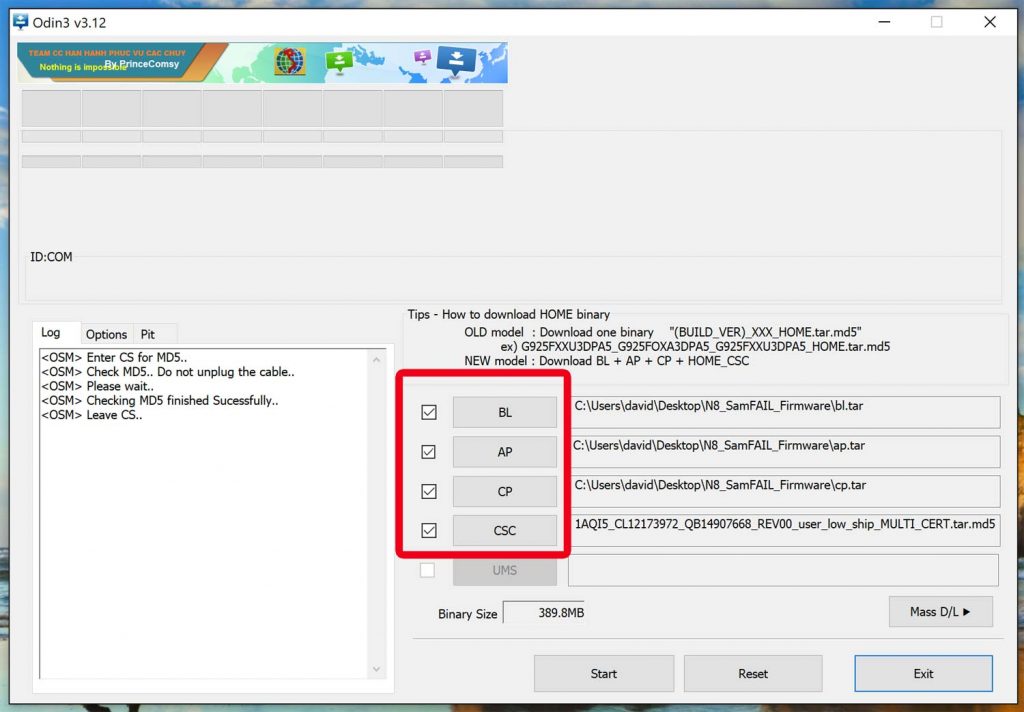
12. On the Options tab, select the following ONLY!
- F. Reset Time
- Auto Reboot
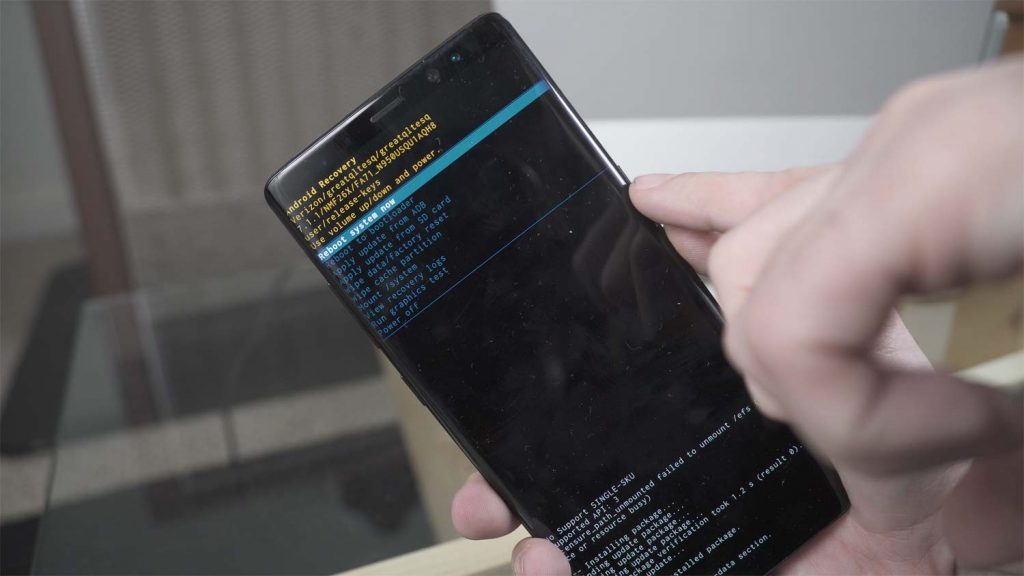
13. Click Start. Your phone will then reboot to recovery mode. If it says Failed to Mount /System (Invalid Argument) there is wrong with your process and you need to start over. But if there’s none, then you can continue.

14. Next, choose Reboot to System (use the volume buttons to navigate and power to select)
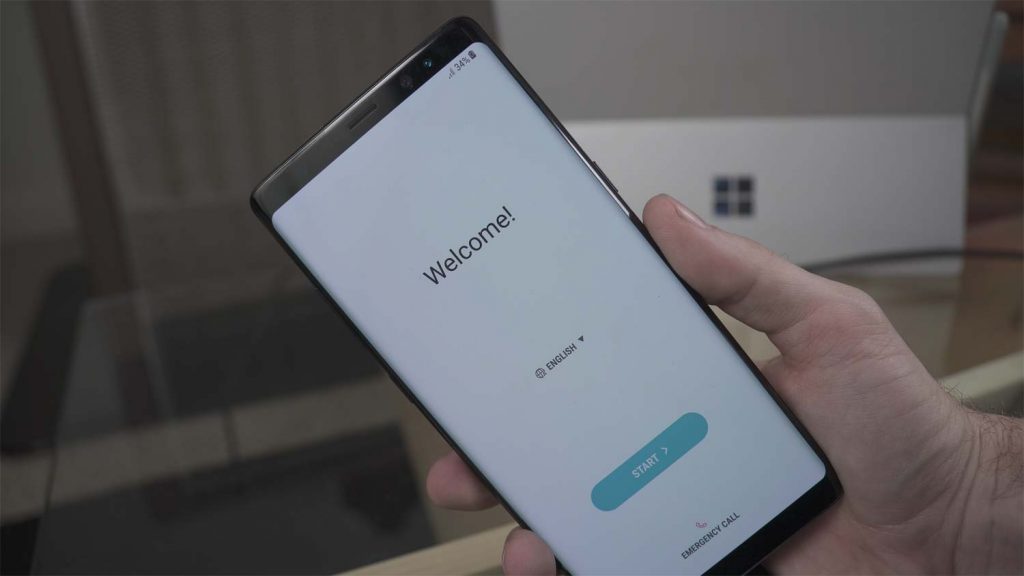
15. Go through the normal setup process once the phone boots up.
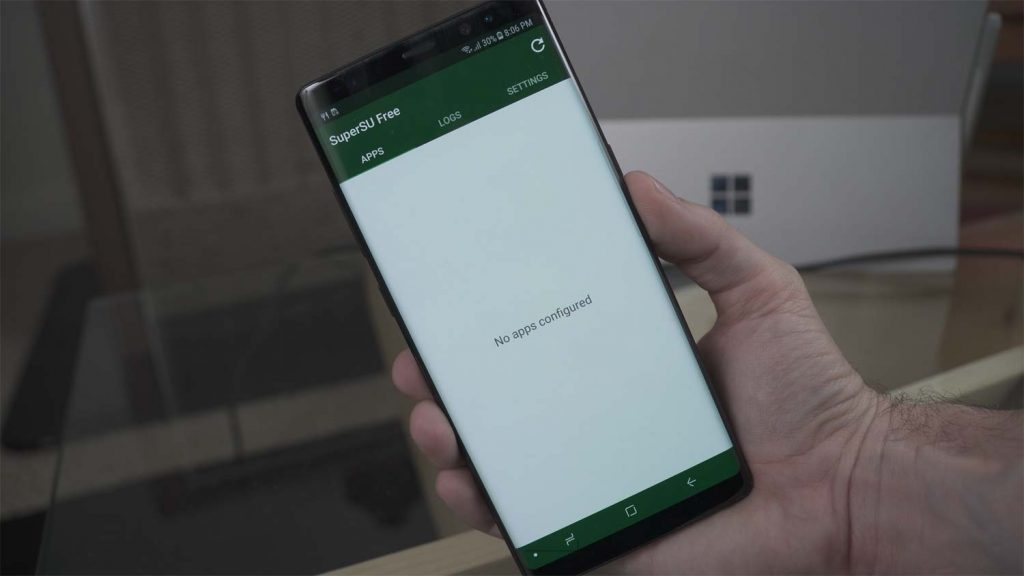
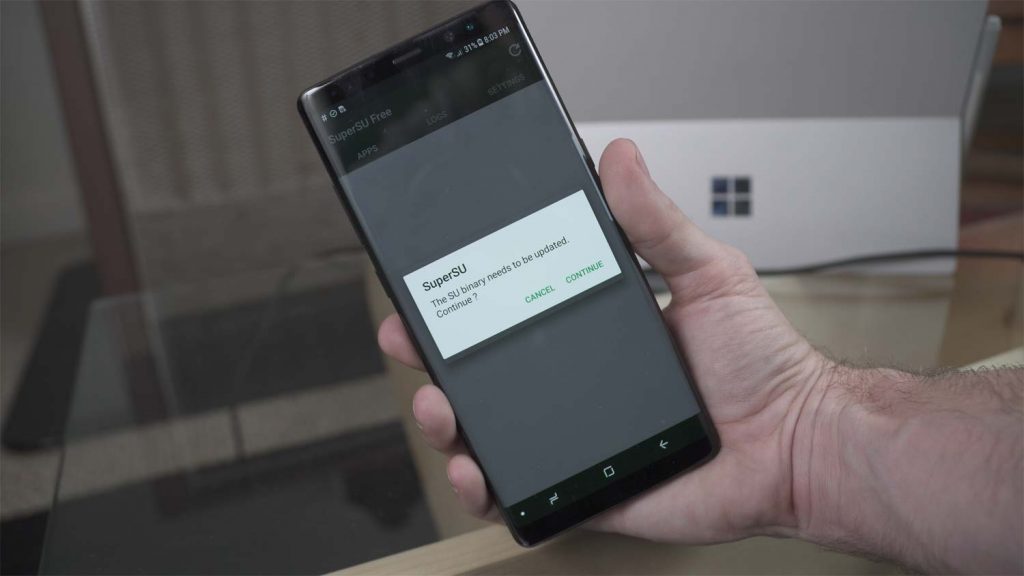
16. When you get to the home screen, open the SuperSU app. It will then ask you to update the binaries.
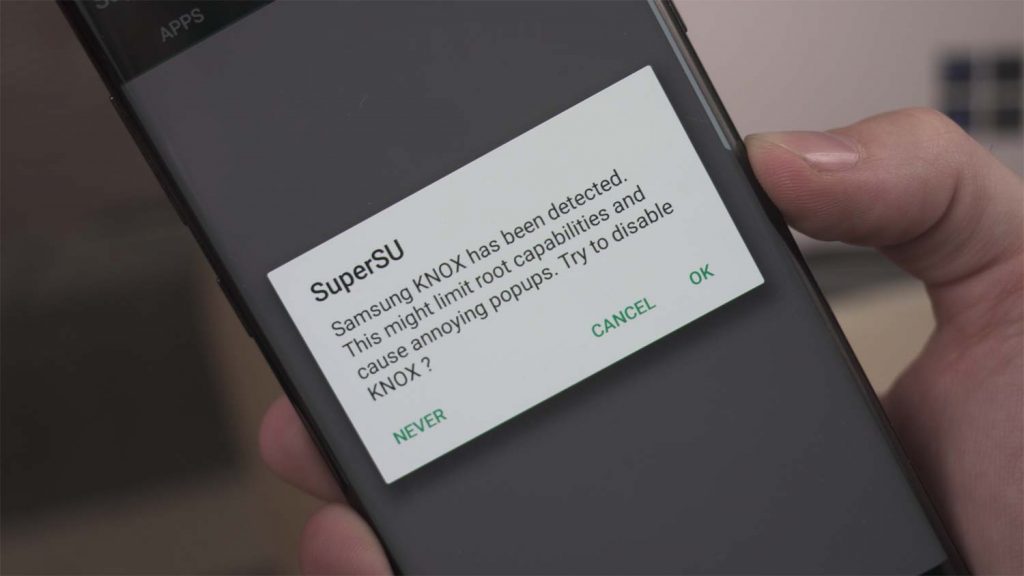
17. Next, you need to select the Normal Method. To disable the Knox, follow the instructions if a message pops up.
18. You will need to reboot when SuperSU is done. Your phone will reboot a few times and once done, you’re done.